
I know it's a little cliche but macaroons really are like France... when done right they are chic beautiful little pieces of art with just that hint of culinary arrogance. However if one deigns to not speak their language impeccably they will laugh in your face. Instead of perfect pastel disks joined harmoniously with lavishes of ganache you often end up with dull misshaped blobs unevenly united with oozy filling, it's tragic really.

Try as I may to learn the subtleties of the language of the macaroon my pronunciation is never quite perfect...
For a long time now I've been trawling the annuls of the internet to find the ultimate 'fool proof' macaroon recipe. I'm not the only one it would seem. In fact I stumbled upon my latest culinary hero in Ms Humble in my search. She has tried at lengths to find a recipe that works beautifully for us mere mortals in the kitchen but alas her skills outdo mine and try as I may to reproduce her script faithfully...well the proof is in the pictures.
Here is Ms Humble's Recipe for Macaroons (I've adjusted it slightly for the Australian audience)... she put in a great deal of research to get to this point, the full account can be found here
yields 50 (100 shells) macarons (feel free to divide it for fewer cookies)
(haha I managed 25 whole ones - Ms Cupcake)
120g almond meal
200g powdered sugar
100g egg whites
30-35g granulated sugar
food coloring gel
Line 2-3 heavy gauge aluminum baking sheets with parchment or silicone liners. Prep a piping bag with a round tip (I used a Ateco #11). I place the bag into a tall drinking glass (or stout glass) and cuff the bag's opening over the top, this makes the bag easy to fill hands-free.
Weigh out almond meal and powdered sugar and sift together to remove any clumps. (If you own a food processor, I highly recommend blending the ingredients and then sifting.)
Weigh out the egg whites into a large mixing bowl (stainless steel or copper), if you're using stainless feel free to add a pinch of salt, 1/4 teaspoon cream of tartar or couple drops of lemon juice to help strengthen the whites. If you're using copper you need not and should not add any additional acid.
Weigh out the granulated sugar.
Begin beating the eggs on low speed. What you're doing here is unraveling the egg white's proteins (these are what will capture the air bubbles you whisk in), they're bundled up and you need to gently unwind them. A light touch does this far better than scrambling them on high speed. Once the egg whites are very foamy, begin sprinkling in the sugar as you beat. Increase the speed to medium, if necessary, and beat the meringue to stiff glossy peaks. (If they start looking grainy, clumpy or dry... uh... you've gone too far.)

This is where I stopped beating
Add the food coloring (for the full recipe it usually takes 2-4 drops of gel, for a half batch 1-2 drops does the trick) and mix.
Add about 1/4 of the almond/sugar mixture and fold in until no streaks remain. Continue to add the almond mixture in quarters, folding until it's a homogenous mixture...be reasonably careful with the mix, but not a delicate as meringue
Pour the batter into your prepared piping bag and pipe rows of batter (dollops a little bigger than a 10c piece) onto the baking sheets, giving them space to spread.
Tap the pan on the counter to bring up any air bubbles and quickly pop them with a toothpick.
Allow the cookies to rest on a level surface for 30-60 minutes. Until they are no longer tacky to a light touch. If you have problems with burst shells, you may need to allow them to rest longer or double stack your baking sheets to provided better insulation from the bottom.

Bake for 16-20 minutes.
Remove the biscuits from the sheet soon after removing from the oven. If they're very sticky you may need to allow them to cool a little but ideally they'll have good bottoms and you can lift them right off the paper immediately. Place them upside down on a surface to cool (I find allowing them to cool upside down prevents the biscuit's interiors from settling during cooling and creating hollows).

I tried both silicone and baking paper, the silicone buckled but gave a nicer bottom to the biscuits
While they rest, place an oven rack in the lower 3rd of your oven and preheat to 135-155°C (I've had the most success with about 140-145°C). I do not use fan-forced (convection) heat. If your oven tends to brown the biscuits, consider placing a rack in the top of the oven with a baking sheet on it to shield them.
Bake for 16-20 minutes.
Remove the biscuits from the sheet soon after removing from the oven. If they're very sticky you may need to allow them to cool a little but ideally they'll have good bottoms and you can lift them right off the paper immediately. Place them upside down on a surface to cool (I find allowing them to cool upside down prevents the biscuit's interiors from settling during cooling and creating hollows).
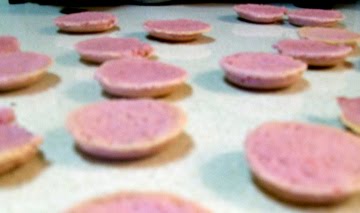
Bottoms up!
OK so I did all of that, I was soo careful with the beating however that I fear I didn't beat quite enough and I think this is where I went wrong and the mixture wasn't light enough, plus my baking sheets are kind of crappy and are not completely flat which upsets the macaroons delicate sensibilities! So although they taste pretty good they are not very pretty, or evenly shaped... oh well we all need something to aspire to!
The Filling
This part takes a little less science and care as long as the filling you use has the consistency of soft butter you can use anything. I made up a recipe for raspberry ganache as follows
100g White Chocolate
75 ml double cream
1/2 cup frozen raspberries
Chop up the chocolate finely and put in a medium sized mixing bowl. Put cream in a little jug and microwave, keeping a close eye on it, until it starts to foam up. Give it a quick stir and add cream to the chocolate. Let it sit there for a little while and then mix until no more little specks of solid chocolate. White chocolate is sensitive to heat so if there are still chunks remaining be very careful in reheating it, only a few seconds at a time and don't stir it too much, it will go grainy!
Leave mixture in the fridge until set. Meanwhile heat the raspberries a little in the microwave and pass through a small strainer to extract as much juice as possible. mix in 2 tablespoons of the ganache into the raspberry, until have a runny mixture then work in 1/2 of the remaining ganache. this should be enough for 25 macaroons. Don't heat this mixture at all or you'll loose the amazing reddy-pink colour you get!
One of the most important things about macaroons is their 'maturation' and that can take up to 3 days (in the fridge)...seriously these biscuits are so pretentious that you can't even eat them when you want! Yes they taste good when you've just just made them but oh man! they are just so incredibly better with a little time, everything melts in together and the flavours harmonise! I suppose that's where the French analogy comes back too; all the hard work and effort to get there is rewarded by the delicious beauty!

hmm they look ok when they're blurry!

No comments:
Post a Comment